Last updated: June 12, 2026


Disclosure: As an Amazon Associate we earn from qualifying purchases. This page contains affiliate links and we may earn a commission at no extra cost to you.
Puck prep is everything that happens between the grinder and the group head, and it is where home espresso is won or lost. The machine only does one thing: push hot water through your coffee at pressure. Whether that water extracts evenly — sweet, balanced, syrupy — or tears through a weak point and ruins the cup is decided before you ever touch the brew button, by how the grounds were dosed, stirred, leveled, and compressed. Cafés drill this into baristas on day one; home baristas often discover it only after blaming their machine, their beans, and their water first.
A complete prep routine takes about thirty seconds and four inexpensive tools: a dosing funnel, a WDT stirrer, a distributor or leveling touch, and a tamper, with an optional puck screen as insurance. This guide walks the full sequence step by step, explains what each stage actually does to the coffee bed, and recommends the kits we trust across 51mm, 53mm, and 58mm portafilter sizes. If you are still deciding how much coffee to load in the first place, our espresso ratio recipe guide pairs with this one — dose and prep are two halves of the same discipline.
Master the routine below and the most common espresso defects — sourness, harshness, gushers, spritzers — quietly disappear from your mornings.
Quick answer: Our top pick in 2026 is the 51mm Distributor & Tamper Kit with Funnel — our #1 rated choice. See the full ranked comparison, alternatives and buying advice below.
Quick Comparison
| Product | Price | Rating |
|---|---|---|
| 51mm Distributor & Tamper Kit with Funnel | $19.99 | 5.0/5 |
| MATOW 53mm Distributor and Tamper | $35.99 | 4.7/5 |
| WDT Tool with 0.35mm Needles & Stand | $19.99 | 4.7/5 |
| Philorn 51mm 6-Piece Kit | $23.99 | 4.7/5 |
| Reoszeank 51mm Accessories Kit | $26.99 | 4.6/5 |
| Coffee Stirrer WDT Distribution Tool | $9.99 | 4.6/5 |
Why Trust This Guide
See also: How to Descale a Breville Espresso Machine Step by Step • How to Make Iced Coffee at Home (Not Bitter, Not Watery)
Everything here is grounded in daily home-bar practice: we run prep routines side by side on the same machine and beans, watch extractions through a bottomless portafilter, and keep only the steps and tools that visibly improve evenness in the cup. We recommend gear we have used through weeks of real mornings, and we are explicit about which steps matter most when time is short.
51mm Distributor & Tamper Kit with Funnel
This kit gives 51mm-machine owners the two compression-stage tools — an adjustable dual-head distributor-tamper — plus the dosing funnel that keeps small baskets tidy. Compact machines have the least margin for sloppy prep, and this set turns their weakest point into a routine.
The distributor face spins the surface flat after stirring, the tamper face finishes the bed with even pressure, and the funnel prevents the lopsided dosing that small rims invite. For an entry-level machine it is close to a complete prep upgrade in one box. The pieces are simple but well finished, and the adjustable depth means it grows with you as you experiment with dose sizes.
MATOW 53mm Distributor and Tamper
The MATOW dual-head tool is the standard recommendation for Breville-format baskets, and for good reason: one flip takes you from raking the bed level to compressing it flat. The slanted fins erase surface mounds left by stirring, and the weighted body lets the tamp settle level without force.
If you own a Barista Express or any of its 54mm-basket siblings, this tool plus a WDT stirrer is the eighty-percent solution to puck prep. Verify your basket size before ordering — the 53mm class fits Breville-style baskets, not commercial 58mm gear. Its only limitation is fixed tamp pressure feedback; the calibration is your wrist, not a spring.
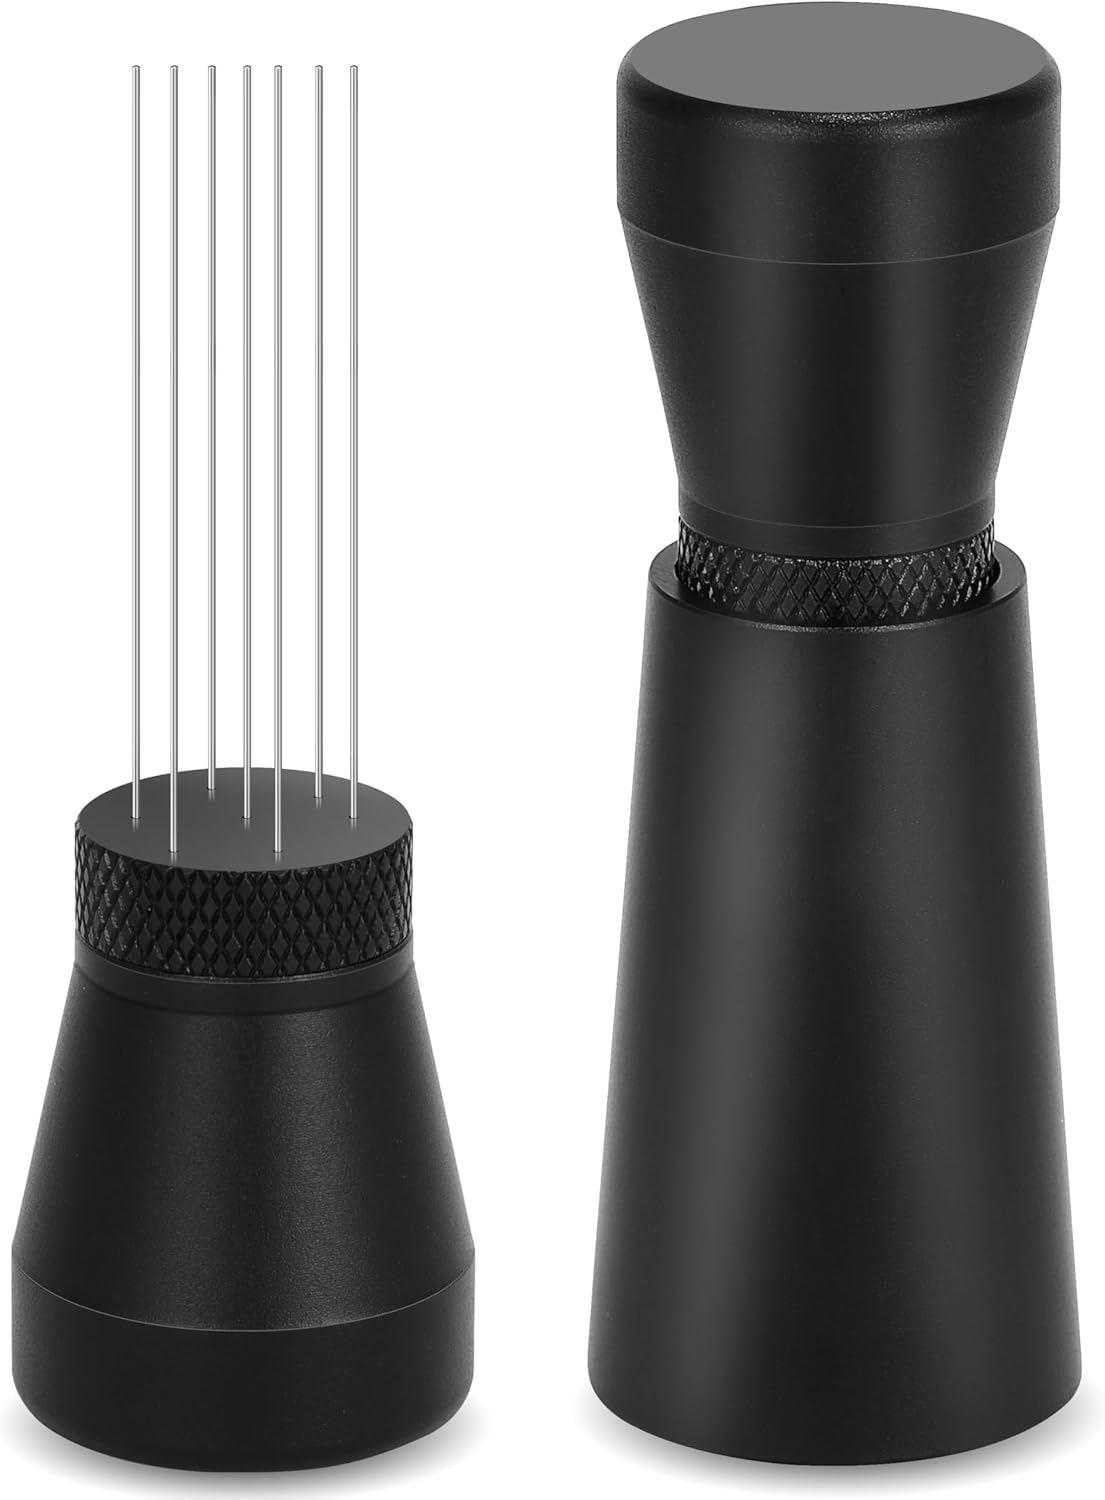
WDT Tool with 0.35mm Needles & Stand
This is the scalpel of the lineup: ten 0.35mm stainless needles on a handle, with a stand to keep it upright between shots. Needles this fine pass through the coffee bed without dragging furrows, which is exactly what you want — WDT done right leaves the grounds looking like sifted flour, with no memory of the clumps that came out of the grinder.
It works across basket sizes since stirring does not depend on diameter fit, making it the one tool in this guide that follows you through machine upgrades. Use it from the basket floor upward in small circles, finishing with shallow surface passes. If you buy a single item from this page, and your shots vary from day to day, buy this one.
Philorn 51mm 6-Piece Kit
Philorn’s six-piece set is the most complete 51mm package here: dual-head leveler, puck screen, tamper mat, and supporting pieces that turn a bare counter into a small prep station. The mat matters more than it looks — tamping into a portafilter braced on a proper mat is steadier and kinder to your basket than levering it against the drip tray.
The puck screen adds the final layer of evenness, spreading the shower screen’s first jets across the bed. For gift-giving or for a first machine, a kit that installs an entire workflow at once has real appeal; the tradeoff is that no single piece reaches premium-tool finish. As a system, though, it delivers a disciplined routine on machines that rarely get one.
Reoszeank 51mm Accessories Kit
Reoszeank’s kit covers the same compact-machine territory with a distributor-tamper, WDT tool, and accessories, and it earns its place through the strength of that WDT inclusion. Entry-level machines almost always live with entry-level grinders, and entry-level grinders clump — so the stirring step delivers more improvement per dollar on these setups than anywhere else in espresso.
The distributor face is properly sized for 51mm baskets, leaving no untouched ring at the wall, and the whole kit stores compactly. Choose between this and the Philorn set based on which extras you value: this one leans into the stirring stage, the Philorn into the tamping station. Either way the routine they enable is identical.
Coffee Stirrer WDT Distribution Tool
At roughly the price of two café lattes, this needle stirrer is the lowest-cost entry into proper puck prep. There is no funnel, no screen, no stand — just the tool that performs the single highest-impact step. If you are skeptical that prep matters at all, this is the cheapest way to be proven wrong.
Technique carries more weight with a minimal tool: dose through whatever funnel or steady hand you have, stir thoroughly from the bottom, level with a light finger sweep, and tamp flat. Many owners start here, watch their shots even out, and then add a funnel and screen later. As a first step out of “spoon and hope” prep, it is unbeatable value.
What to Look For in Espresso Puck Prep Tools
Prep tools are simple machines, but small details decide whether they improve your puck or just decorate the counter:
- True size match — every contact tool (funnel, distributor, tamper, screen) must match your basket’s real inner diameter; Breville’s nominal 54mm baskets take 53.3mm tools.
- Fine, full-depth needles — 0.35mm-class needles long enough to reach the basket floor are the difference between erasing clumps and merely combing the surface.
- Adjustable distributor depth — fins should skim your dose’s surface; set too deep they compact and crack the bed, too shallow they do nothing.
- Level, comfortable tamping — a flat base and a handle that encourages straight-down pressure beat raw heft; tilt is the enemy, not softness.
- Puck screen rigidity — a screen that stays flat under water flow diffuses evenly; thin ones dimple and concentrate flow instead.
- Workflow storage — stands, mats, and magnetic parts keep the routine fast enough that you will actually do it every single shot.
Tips for Getting the Most Out of Your Puck Prep
Sequence beats enthusiasm. The order that works is: funnel on, dose in, WDT from the floor of the basket upward, level the surface, one decisive flat tamp, optional screen, brew. Resist the urge to re-tamp or tap the portafilter afterward — knocking the side cracks the seal between puck and basket wall and undoes everything. Weigh your dose every time, because a half-gram swing changes how deep your distributor bites and how the tamp seats; consistency in, consistency out.
Give the routine honest feedback. Watch shot color and timing, and ideally watch the underside of a bottomless portafilter — even bed prep shows up as a single centered stream that develops slowly from dark to gold. When something looks off, change one prep variable at a time, exactly as you would when dialing grind. Prep problems and grind problems masquerade as each other, and our grind size guide helps you tell them apart.
Finally, keep perspective on where prep sits in the chain. It cannot fix stale beans, a misdialed recipe, or a grinder with wild particle variance — it removes noise so those real signals become visible. Measure your output honestly too: a marked vessel like the ones in our measuring shot glass review closes the loop, confirming that identical prep is now delivering identical yields. That repeatability is the whole prize.
Frequently Asked Questions
How long should good puck prep take?
About twenty to forty seconds once the routine is habitual: a few seconds of dosing through a funnel, ten of WDT stirring, a spin of the distributor, one tamp, screen on. If prep is taking minutes, simplify — an elaborate ritual you eventually skip is worse than a quick one you always perform.
Do I need both a distributor and a tamper?
They do different jobs: the distributor levels and settles the loose bed, the tamper compresses it. Dual-head tools bundle both affordably. If you must pick one, keep the tamper and level with WDT plus a finger sweep — compression is non-negotiable, leveling has substitutes.
Is the Ross Droplet Technique (RDT) part of puck prep?
RDT — a tiny spritz of water on beans before grinding — fights static and mess rather than puck structure, but less mess means more accurate dosing, so it supports the routine. One light spray is plenty; soaked beans can gum up burrs.
My prep is perfect but shots are still inconsistent — what now?
Look upstream and downstream. Upstream: grinder consistency and bean freshness are the usual culprits. Downstream: machine temperature stability and pump behavior vary shot to shot on entry-level machines. Perfect prep does not abolish those variables; it exposes them clearly enough to fix.
Ready to decide? Our #1 pick for 2026 is the 51mm Distributor & Tamper Kit with Funnel.
Live price & availability on Amazon.