- Top Pick: MATOW Stainless Steel Mini WDT Espresso Distribution Tool
- Best Value: Coffee Maker Steam 3&4 Hole Nozzle 304 Stainless Steel Multiple Holes Tip Milk Foam Spout for Breville 8 Series Espresso Machine Steam Wand Tip Part Replacement
- Premium Choice: zeroHero WDT Tool 58mm,Espresso Needle Distributor for Even Extraction
Last updated: October 9, 2026
As an Amazon Associate we earn from qualifying purchases at no extra cost to you.


Quick Comparison
| Product | Brand | Price | Rating |
|---|---|---|---|
| Espresso Accessories Kit | NAPNOOK | $19.99 | 5/5 |
| 51mm Espresso Accessories Kit | Trenqular | $18.99 | 5/5 |
| MHW-3BOMBER WDT Tool Espresso Distribution Tool with Ma… | MHW-3BOMBER | $23.99 | 4.8/5 |
| WDT tool | WISSXOER | $19.99 | 4.7/5 |
| XIXUBX 2-in-1 Espresso Tamper & Magnetic WDT Tool | XIXUBX | $25.19 | 4.7/5 |
Introduction
See also: How Much Caffeine Is in a Cup of Coffee? • How to Descale a Breville Espresso Machine Step by Step
Pulling great espresso at home is a process of systematic refinement, not magic. Every variable — grind size, dose, tamp pressure, water temperature, and brew time — interacts with the others, and understanding how each affects extraction taste gives you a clear diagnostic framework. The tips below will accelerate your learning curve dramatically.
What to Look For
- Grind is the Primary Variable: Adjust grind size first when a shot tastes sour (under-extracted — grind finer) or bitter (over-extracted — grind coarser) before touching any other variable. Grind has the most immediate and largest impact on extraction quality.
- Consistent Puck Prep: Even distribution and level tamping are prerequisites for even extraction. Channeling — where water finds the path of least resistance through an uneven puck — is the most common source of sour, inconsistent shots. WDT tools and distribution tools address this directly.
- Track Your Recipe: Record dose (g), yield (g), and extraction time (seconds) for every shot. A well-extracted espresso typically runs 25–35 seconds at a 1:2 ratio (18g in, 36g out). Drift from this window signals something has changed — beans aged, temperature shifted, grinder drifted.
Top Picks
Decent Espresso DE1Pro (Advanced Extraction Control)
The Decent DE1Pro is the most advanced home espresso machine for extraction control, offering pressure profiling, flow rate control, and temperature profiling. For enthusiasts who want to understand extraction at a deep level, the Decent’s Bluetooth app visualizes every shot parameter in real time.
Weiss Distribution Technique (WDT) Tool
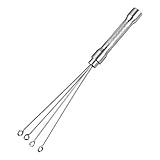
WDT tools use fine needles to break up clumps in the ground coffee before tamping, enabling dramatically more even puck density. This single piece of equipment — often under $30 — reduces channeling more reliably than any other puck prep tool, making it one of the highest-return accessories in home espresso.
Acaia Lunar Espresso Scale (Slimline)
Tracking your espresso recipe requires a scale that fits on the drip tray under the portafilter during extraction. The Acaia Lunar’s 8mm-thin profile and fast response rate make it the standard recommendation for espresso ratio tracking, and the app integration lets you log every shot for trend analysis.
Mastering the Variables of Espresso Extraction
Great espresso is the product of a few interlocking variables, and understanding them is the key to better shots. The foundation is the brewing ratio: a typical recipe pulls about 36 grams of liquid espresso from 18 grams of ground coffee, roughly a 1:2 ratio, in about 25 to 30 seconds. Grind size is your primary control; a finer grind slows the flow and increases extraction, while a coarser grind speeds it up. Because espresso is so concentrated, even small grind adjustments noticeably change the taste.
Water temperature should sit around 195 to 205 degrees Fahrenheit, and pressure should be near 9 bars during extraction, the established benchmarks for balanced flavor. Dose consistency matters too, so weigh your coffee rather than guessing. When these variables align, you get a sweet, balanced shot with rich crema. When they drift, the cup tells you: sour and thin means under-extraction, while bitter and hollow means over-extraction. Learning to read those signals is what turns guesswork into repeatable results.
Puck Prep and Troubleshooting Common Problems
How you prepare the coffee puck is as important as your grind. After dosing, distribute the grounds evenly in the basket to eliminate clumps and high spots, then tamp with firm, level pressure. The goal is a flat, uniform puck so water flows through evenly. Uneven prep causes channeling, where water carves a path through a weak spot and races through, leaving much of the puck under-extracted while the channel over-extracts; the result is a shot that tastes both sour and bitter at once.
To troubleshoot, change one variable at a time and taste the difference. If shots consistently run too fast, grind finer; if they choke and drip, grind coarser. If you see spurting or blonding too early despite a good grind, focus on distribution and tamping to fix channeling. Keep your equipment clean, since old coffee oils add bitterness, and use fresh beans, because espresso loses its best qualities quickly after roasting and grinding. Brief notes on grind, dose, yield, and time make every shot a step toward consistency.
Frequently Asked Questions
What is the ideal espresso ratio?
A common target is about 1:2, pulling roughly 36 grams of espresso from 18 grams of coffee in 25 to 30 seconds. This brew ratio is a reliable starting point that you can fine-tune to taste.
Why does my espresso taste sour?
Sourness typically signals under-extraction. Try grinding finer to slow the flow, increasing the dose slightly, or ensuring your water is in the 195 to 205 degree Fahrenheit range. Even, careful puck prep also helps.
What is channeling and how do I prevent it?
Channeling is when water carves a path through a weak spot in the puck, over-extracting there and under-extracting elsewhere. Prevent it with even grounds distribution and a firm, level tamp that creates a uniform, flat puck.
How does grind size affect my shot?
Grind size is your main control over flow rate and extraction. A finer grind slows the shot and extracts more; a coarser grind speeds it up and extracts less. Small adjustments make a big difference with espresso.
How long should an espresso shot take?
A typical double shot pulls in about 25 to 30 seconds. Much faster usually means the grind is too coarse, while much slower means it is too fine. Use shot time as a quick diagnostic alongside taste.
Final Thoughts
Better espresso at home is a matter of eliminating variables one at a time. Master grind, dose, and yield first — get those consistent, and everything else becomes easier to diagnose. Every improvement to your puck prep, temperature control, and recipe tracking compounds, and the result is consistently excellent espresso you can reproduce every morning.