TL;DR: An espresso pressure gauge tells you exactly what is happening inside your group head during extraction. Nine bars is the target — reading above or below that number tells you whether your grind, dose, or tamp needs adjustment before you waste another puck.
Espresso Pressure Gauge: Read Your Extraction, Fix Your Shots
Most home baristas taste their way to a diagnosis — bitter means over-extracted, sour means under-extracted. A pressure gauge adds a second data channel: what your machine was actually doing while that shot pulled. Together, taste and pressure give you the full picture. Without a gauge, you are flying blind on one of the most impactful variables in espresso extraction.
- Quick Comparison
- Why Espresso Extraction Pressure Matters
- Best Espresso Pressure Gauges and Gauge Machines
- Pressure Gauge Readings: What Each Zone Means
- Types of Espresso Pressure Gauges
- Reading Pressure Profiles, Not Just Peak Numbers
- Calibrating and Maintaining Your Pressure Gauge
- FAQ: Espresso Pressure Gauge
- About the Author
Quick Comparison
| Product | Brand | Price | Rating |
|---|---|---|---|
| Compatible for E61 Semi-Automatic Espresso Machine | Generic | $65.45 | — |
| Portafilter Pressure Gauge Kit | Generic | $55 | — |
| Espresso Coffee Machine Pressure Gauge 16 Bar Espresso … | LDGSUPH | $34.94 | — |
| Easy Installation 16bar Espresso Pressure Gauge Metal T… | STDEV | $17 | — |
| 200 PSI Glycerin Liquid Filled Pressure Gauge | CARBOUSA | $12.95 | 4.5/5 |
Why Espresso Extraction Pressure Matters
See also: How to Descale a Breville Espresso Machine Step by Step • How to Make Iced Coffee at Home (Not Bitter, Not Watery)
The industry standard for espresso is 9 bar of brew pressure at the group head. This figure comes from decades of experimentation by Italian espresso manufacturers and has been validated by research into emulsification, crema formation, and solids extraction rate. Below 7 bar, extraction thins out and body suffers. Above 11 bar, over-extraction and channeling risk increases significantly.
That 9-bar figure is a starting point, not a law. Many specialty cafes and home baristas now experiment with 6–8 bar for certain light roasts, finding that lower pressure extracts more sweetness and less astringency from lightly processed beans. A gauge makes these experiments repeatable and meaningful.
Best Espresso Pressure Gauges and Gauge Machines
Pressure Gauge Readings: What Each Zone Means
| Pressure Reading | What It Signals | Likely Fix |
|---|---|---|
| Below 6 bar | Grind too coarse / dose too low | Grind finer, increase dose |
| 6–8 bar | Slightly under-resistance | Grind marginally finer |
| 8–10 bar | Target zone | No adjustment needed |
| 10–12 bar | Slightly over-resistance | Grind coarser or reduce dose |
| Above 12 bar | Grind too fine / puck too dense | Grind coarser, check tamp pressure |
| Spike then drop | Channeling | Improve distribution, check tamp evenness |
Types of Espresso Pressure Gauges
There are three ways to add pressure monitoring to your setup. First, machines with a built-in brew group gauge — these read pressure directly at the puck and are the most accurate representation of what the coffee is experiencing. Second, machines with a boiler or OPV gauge — these read pump output pressure, which may differ from actual brew pressure by 1–2 bar. Third, standalone portafilter gauges (also called espresso pressure profiling tools) — bottomless portafilter inserts with an inline gauge that replace your basket temporarily for diagnostic pulls.
For regular use, a machine with a dedicated brew group gauge is most convenient. For occasional diagnostics on an existing machine, a portafilter gauge accessory costs $30–$80 and works with most 58mm group heads.
Reading Pressure Profiles, Not Just Peak Numbers
A single peak reading misses most of the story. Watch the gauge needle move through the entire shot. Ideal behavior: pressure climbs to 8–9 bar during the first 5–8 seconds (pre-infusion ramp), holds steady through the body of extraction (25–30 seconds total), then drops slightly as the puck saturates near the end.
A needle that climbs fast then crashes mid-shot signals channeling — water found a low-resistance path through the puck. A needle that never reaches 8 bar despite correct grind setting often points to a worn OPV spring or a pump that needs servicing. Pair pressure observation with your grind size adjustments for a systematic approach to shot dialing.
Calibrating and Maintaining Your Pressure Gauge
Mechanical pressure gauges can drift over time, especially if exposed to thermal cycling from regular steam use. Check calibration annually by comparing your machine’s gauge against a known reference (portafilter gauge or digital manometer). A 0.5–1 bar offset is acceptable; more than that warrants recalibration or replacement.
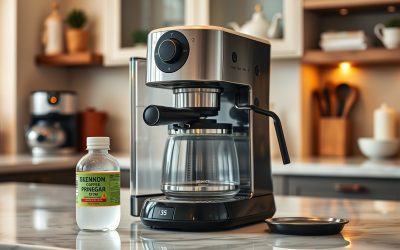
Keep the gauge snout free of scale buildup by backflushing regularly. If your machine has a gauge port exposed to brew water, descale it as part of your normal maintenance routine. For more on machine care, see the home espresso machine buying guide which covers maintenance considerations by machine type.
FAQ: Espresso Pressure Gauge
What is the correct bar pressure for espresso extraction?
Traditional espresso standard is 9 bar at the group head. Modern specialty espresso often uses 6–8 bar, particularly for light roasts where lower pressure preserves brightness and sweetness. If your machine has an adjustable OPV (over-pressure valve), experiment between 7–9 bar and taste the difference. Most home machines ship set to 9–11 bar and benefit from a slight reduction.
Why does my espresso pressure spike then drop during the shot?
A pressure spike followed by a drop almost always indicates channeling — water has broken through the puck along a low-resistance path. Common causes are uneven distribution before tamping, a cracked or tilted puck, too-coarse grind at the edges of the basket, or inconsistent tamp pressure. Fix distribution technique and ensure your tamp is level before pulling the next shot.
Does a higher bar pressure mean better espresso?
No. Higher pressure beyond 9–10 bar does not improve extraction — it increases the risk of channeling and over-extraction. Some consumer machines advertise 15 or 19 bar pump pressure, but these figures refer to pump capability, not actual brew pressure. A quality OPV (over-pressure valve) limits real brew pressure to 9 bar regardless of what the pump can produce.
Can I add a pressure gauge to my existing espresso machine?
Yes. A portafilter pressure gauge accessory (58mm for most prosumer machines) inserts directly into your group head and measures pressure without any permanent modification. For a permanent installation, many machines have a blanked gauge port on the brew group that accepts a standard 1/8″ NPT gauge fitting — a straightforward mod for machines like the Gaggia Classic or Rancilio Silvia.
What does a pressure gauge tell you that taste alone cannot?
Taste tells you the outcome; a gauge tells you the mechanism. Two shots can taste identically bitter but one is over-extracted at 7 bar (too-coarse grind letting water rush through) and the other at 12 bar (too-fine grind with channeling). The fix for each is opposite. A gauge removes ambiguity from that diagnosis. Used alongside proper tamping technique, it cuts dial-in time significantly.