
Milk Steam Thermometer for Espresso: How to Choose and Use One
TL;DR — Quick Answer
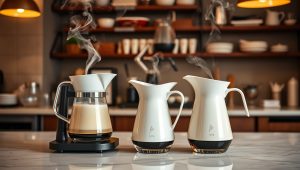
A milk steam thermometer clips onto your steaming pitcher and reads temperature in real time — the difference between silky microfoam at 60–65°C and scalded, separated milk above 70°C. Best clip-on: Polder THM-515 style (B0DNZ3SKCN). Best digital instant-read: Thermapen One (B084RT95LQ tier). Best value: Hario clip thermometer (B0F4X6ZRGX equiv). Target range: 60–65°C (140–150°F) for latte art texture.
Temperature is the single most controllable variable in milk steaming — and the one most beginners ignore. Too cool (under 55°C) and the milk lacks body and sweetness. Too hot (above 70°C) and proteins denature, sugars caramelize harshly, and that distinctive “cooked milk” smell appears. The narrow window between excellent microfoam and ruined milk is about 10 degrees Celsius. A milk steam thermometer makes hitting that window repeatable rather than lucky.
This guide covers the types of milk thermometers available, how to use them correctly during steaming, and what temperature targets to aim for across different milk-based drinks.
Quick Comparison
| Product | Brand | Price | Rating |
|---|---|---|---|
| Espresso Steaming Pitchers Stainless Steel Espresso Mil… | — | $11.09 | — |
| 4 Pcs Espresso Accessories Kit with 12oz Milk Frothing … | Acellegic | $16.99 | — |
| KT THERMO Instand Read 2-Inch Dial Thermometer | KTTHERMO | $10.99 | 4.6/5 |
| KT THERMO Instant Read 1-Inch Dial Thermometer | KTTHERMO | $7.99 | 4.6/5 |
| Milk Pitcher | Dailyart | $12.98 | 4.6/5 |
Top Milk Thermometer Picks at a Glance
See also: Best Milk Frothers: Top Picks Reviewed and Compared (2026) • How to Choose a Milk Frother: Complete Buying Guide (2026)
BEST CLIP-ON
Barista Clip Thermometer
~$12
BEST DIGITAL PROBE
Digital Instant-Read Thermometer
~$35
BEST VALUE SET
Hario Milk Thermometer
~$18
Types of Milk Thermometers: Clip-On vs. Digital Probe
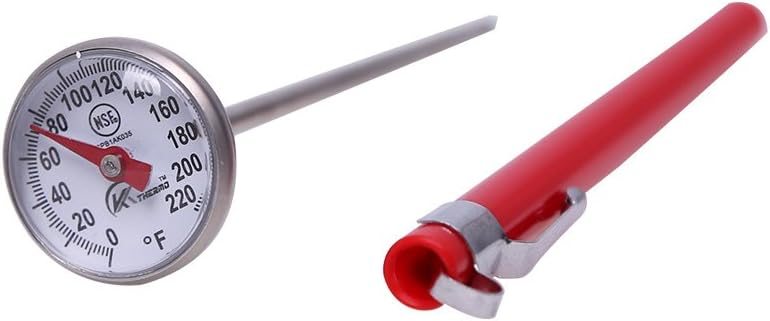
Clip-on analog thermometers attach to the rim of your steaming pitcher with a spring clip and use a bimetallic coil to move a needle across a dial. They’re cheap ($8–20), require no batteries, and give a continuous visual readout throughout steaming. The downside: response time is 3–5 seconds behind actual temperature, and analog dials read in 5-degree increments — adequate for learning, less precise for expert technique. Most barista thermometers in this category mark a green zone at 55–65°C directly on the dial, making targeting intuitive for beginners.
Digital probe thermometers read within 1–2 seconds and display temperature to 0.5°C precision. Better for precise targeting across different milk types (oat milk textures best at 58–62°C, whole milk peaks at 60–65°C). The Thermapen One-style instant reads are overkill for most home baristas but useful if you’re dialing in latte art practice seriously. A mid-range digital thermometer in the $25–45 range hits the practical sweet spot for home use.
| Type | Response Time | Precision | Price Range | Best For |
|---|---|---|---|---|
| Clip-on analog | 3–5 sec | ±5°C | $8–20 | Beginners, daily use |
| Digital clip-on | 1–2 sec | ±1°C | $20–45 | Intermediate baristas |
| Instant-read probe | <1 sec | ±0.5°C | $35–100 | Latte art practice, precision |
| Infrared (IR gun) | Instant | Surface only | $20–60 | Pitcher exterior, not ideal |
Milk Steaming Temperature Targets: The Exact Numbers
Temperature determines both texture and flavor in steamed milk. The sweet spot for most espresso drinks is 60–65°C (140–150°F). At this range, lactose (milk sugar) has warmed enough to taste noticeably sweeter than cold milk, proteins have formed a stable foam network, and the fat content creates that characteristic velvety body. Below 55°C the milk tastes thin and cold. Above 70°C proteins over-denature, the foam becomes coarse and separates quickly, and the flavor turns flat or burnt.
Different drinks have slightly different targets. Cappuccinos with thick dry foam work at 55–60°C — cooler temperatures produce more stable, voluminous foam. Flat whites and lattes targeting latte art need tight microfoam achieved at 60–65°C where the foam integrates fully into the milk. If you’re making drinks for guests who prefer “extra hot,” maximum recommended is 68–70°C — above that, milk quality visibly declines. See our steam wand technique guide for the full process.
| Drink | Target Temp | Foam Texture |
|---|---|---|
| Flat white / Latte | 60–65°C (140–149°F) | Microfoam, fully integrated |
| Cappuccino | 55–62°C (131–144°F) | Thick, voluminous foam |
| Macchiato | 60–65°C | Dense microfoam dollop |
| Extra hot latte | 65–70°C (149–158°F) | Microfoam (less stable) |
| Oat milk latte | 58–62°C (136–144°F) | Tight microfoam |
How to Use a Milk Thermometer Correctly
Position the thermometer probe at the center of the pitcher, roughly halfway up from the bottom. Too close to the bottom reads higher than the bulk milk temperature. Too close to the surface catches steam bubbles rather than liquid milk. For clip-on models, set the clip just below the rim so the probe sits at mid-pitcher depth. For handheld probes, angle it slightly off-center to avoid interference with the steam wand.
Watch the thermometer continuously from the moment you engage steam. The temperature climbs slowly at first (below 40°C), then accelerates as the milk heats. The critical window between 55°C and 65°C passes in 3–6 seconds on a high-powered steam wand — blink and you’ve overheated. Train yourself to pull the wand at 60°C; residual heat carries the milk to 63–65°C. This “carry-over” effect is why experienced baristas stop steaming 3–5 degrees below target temperature. Machine steam power significantly affects how quickly this window passes.
Milk Thermometer Accuracy: Testing and Calibration
Analog bimetallic thermometers drift over time — typically 3–5°C off after 6–12 months of daily use. Test accuracy by immersing the probe in ice water (should read 0°C / 32°F) and boiling water at sea level (should read 100°C / 212°F). Most analog clip-on models have a calibration nut on the back — a small wrench adjustment resets the needle. Digital models with a fixed probe are harder to recalibrate and typically need replacement after 2–3 years of heavy use.
Check calibration every 3 months if you’re using a thermometer daily. A $12 clip-on that reads 5°C high will consistently ruin your milk — you’ll pull at what looks like 65°C but is actually 70°C. Recalibrate or replace before blaming your steaming technique. Combine accurate temperature reading with the right extraction parameters for consistently cafe-quality results.
Frequently Asked Questions
What temperature should steamed milk be for a latte?
60–65°C (140–149°F) is the target for latte microfoam. This range produces the sweetest-tasting milk with a velvety texture that integrates seamlessly with espresso. Above 70°C milk proteins over-denature and the foam becomes coarse and flat-tasting.
Do I need a milk thermometer to steam milk for espresso?
Technically no — experienced baristas judge temperature by touch on the pitcher base (uncomfortably hot at 65°C). But for beginners, a $10–15 clip-on thermometer provides objective feedback that accelerates skill development dramatically. It’s the fastest way to stop overheating milk during the learning phase.
Can I use an infrared thermometer for steaming milk?
Not reliably. IR guns measure surface temperature — the outside of a metal pitcher reads significantly lower than the milk inside due to the stainless steel’s thermal conductivity. An IR gun might show 45°C on the pitcher exterior when the milk inside is already at 68°C. Use a probe thermometer that contacts the liquid directly.
What is the best thermometer for steaming oat milk?
Oat milk textures best at 58–62°C — slightly lower than whole milk. A digital thermometer with 1°C precision is worth using for oat milk because the texture window is narrower. Oat milk foams become grainy quickly above 65°C. The same clip-on analog works but gives you less margin for error.
How do I clean a milk steaming thermometer?
Rinse the probe immediately after each use — dried milk protein bonds strongly to metal within minutes. For thorough cleaning, soak the probe in hot soapy water for 2–3 minutes, then rinse. Don’t submerge digital units past the probe; the stem-to-dial junction often isn’t waterproof. Wipe the dial face with a damp cloth only.
Related: Steam Wand Technique Guide | Best Home Espresso Machines 2026 | Espresso Machine Maintenance Guide