Last updated: September 18, 2026
Cleaning espresso grinder burrs is a small maintenance job with a big effect on flavor. Coffee oils, fine particles, and occasional bean fragments can collect between the cutting surfaces, creating stale-tasting shots, uneven grounds, clogs, and slower grinding. If you clean carelessly, you can nick the burrs, damage the motor, lose your grind setting, or leave moisture inside the grinder.
This guide explains how to clean an espresso grinder burrs safely, whether you use a conical-burr or flat-burr home machine. The process usually takes 20 to 30 minutes, plus additional time if you need to let a hopper or catch cup air-dry. Always consult your grinder’s manual first, since burr-removal steps and alignment marks differ by model.
As an Amazon Associate we earn from qualifying purchases at no extra cost to you. Product prices and availability are accurate as of the date shown and are subject to change.
Quick answer: Our top pick in 2026 is the Small grinder-cleaning brush — our #1 rated choice. See the full ranked comparison, alternatives and buying advice below.
What You Need
| Item | Why | Optional? |
|---|---|---|
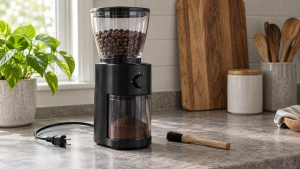
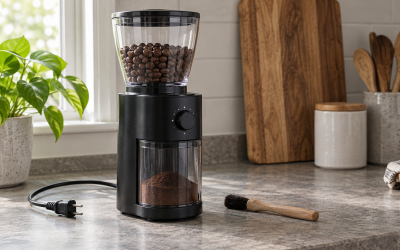
| Small grinder-cleaning brush | Removes grounds from burr teeth, threads, and the exit chute without scratching metal. | No |
| Soft, dry microfiber cloth | Wipes coffee oil from the hopper, lid, dosing area, and exterior. | No |
| Handheld vacuum with a narrow nozzle | Pulls loose grounds from the grinding chamber and chute. | Yes |
| Wooden toothpick or soft detailing tool | Dislodges compacted grounds from corners and the discharge opening. | Yes |
| Grinder-cleaning pellets | Helps absorb loose oil and residue after manual brushing. | Yes |
| Small container or towel | Keeps screws, burr parts, and stray grounds organized during disassembly. | Yes |
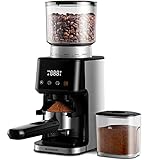
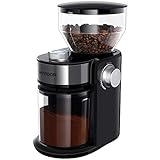
A basic brush and microfiber cloth are enough for routine care. If you are shopping for a home espresso grinder, the SHARDOR Conical Burr Espresso Coffee Grinder with 51 settings is listed at about $70 to $75, while the SHARDOR Electric Burr Coffee Grinder with 16 settings is commonly listed around $35 to $45. Features such as a removable upper burr and accessible chute can make future cleaning easier, but always verify the manufacturer’s instructions before removing any component.
Step-by-Step
See also: Espresso Grinder Hopper Capacity How Much Size Guide With Measurements (2026) • Espresso Grinder Buying Guide for Light Roasts in 2026: What Actually Matters
-
Unplug the grinder and empty the hopper (3 to 5 minutes)
Turn the grinder off, unplug it, and move it to a well-lit work surface. Remove all beans from the hopper. If the hopper has a shutoff gate, close it before lifting the hopper away.
Do not reach into the burrs while the grinder is connected to power. If beans remain in the grinding chamber, pulse the grinder briefly before unplugging it only if your manual permits this procedure. Otherwise, remove the beans by hand after disconnecting the machine.
-
Record the grind setting and remove the upper burr (3 to 7 minutes)
Take a photo of the current grind setting or write down the number and collar position. This makes it easier to return to your espresso setting later. Many grinders require turning the adjustment collar to a marked release position before the upper burr can be lifted out.
Remove only the parts identified as user-serviceable. Do not force a collar, pry against the burr, or remove screws that are not intended for routine cleaning. Place each loose part in a container so it does not roll away.
-
Brush the upper burr thoroughly (3 to 5 minutes)
Hold the upper burr by its outer housing, not by the sharp cutting edges. Brush in the direction that lifts grounds out of the teeth and grooves. Work around the entire burr, including the underside, outer rim, and any threads or tabs used for installation.
Use a dry brush only. Water can cause corrosion or become trapped in the burr carrier. Avoid metal picks, abrasive pads, and stiff wire brushes, which can scratch the burr surface or affect alignment.
-
Clean the lower burr and grinding chamber (5 to 8 minutes)
Brush loose grounds from the lower burr, surrounding ledges, and the chamber walls. Rotate the burr by hand only when the grinder is unplugged and only if it turns freely without resistance. Never place fingers between the cutting surfaces.
A vacuum with a narrow nozzle can collect loosened grounds, but keep the nozzle just above the surface rather than pressing it against the burr. A wooden toothpick can help remove a packed clump from a corner. Do not scrape the burr teeth or force debris deeper into the chute.
-
Clear the discharge chute (2 to 4 minutes)
Ground coffee often remains in the chute after the burrs look clean. Brush from the chamber toward the exit, then vacuum the opening. If the chute has an anti-static flap or declumper, clean around it carefully without bending it.
Some grinders retain several grams of coffee in the chute. This is normal, but a large, oily buildup can cause inconsistent dosing and clogging. A dry wooden tool is safer than a sharp object for removing compacted residue.
-
Clean the hopper, lid, and catch cup (5 to 10 minutes)
Wipe the hopper and lid with a dry or barely damp cloth, then dry them completely. If the manufacturer allows washing these parts, use mild dish soap and warm water, rinse thoroughly, and let them air-dry for at least several hours before reassembly.
Never wash the motor housing, burr carrier, adjustment collar, or any electrical component. Coffee oil left in the hopper can transfer back onto fresh beans, so pay attention to the corners and the underside of the lid.
-
Use cleaning pellets if needed, then reassemble (3 to 5 minutes)
For light maintenance, grinder-cleaning pellets can help collect residue after manual brushing. Use only the amount and setting recommended on the pellet package. Run the grinder empty afterward until no visible pellet dust remains. Do not use uncooked rice unless the manufacturer specifically approves it; rice can be harder than intended for some grinder components and may create excess dust.
Reinstall the burr and hopper in the reverse order. Match the alignment marks and confirm that the burr is seated level. Restore the adjustment collar to its original position without forcing it.
-
Run a small purge and redial the espresso setting (3 to 5 minutes)
Add a small amount of inexpensive beans and grind them at a medium setting to purge remaining cleaning dust. Discard those grounds. Then return to your recorded espresso setting and grind a test dose.
Expect to make a minor adjustment after cleaning. Removing compacted grounds can change the starting point slightly, and the first shot may flow faster or slower than before. Adjust in small steps rather than making a large collar movement.
Mistakes to Avoid
- Cleaning while plugged in: A motor can start unexpectedly if a button or timer is activated.
- Using water on the burrs: Even a small amount trapped inside can encourage rust, clumping, or electrical damage.
- Forcing the adjustment collar: A lodged bean may be blocking movement. Brush and clear the chamber first.
- Scrubbing with metal tools: Scratches and burr damage can affect grind consistency.
- Skipping the chute: Old grounds in the exit path can contaminate fresh coffee and cause retention.
- Reassembling wet parts: Allow washed plastic pieces to dry fully before putting them back.
- Changing the setting without recording it: A photo prevents unnecessary espresso dialing-in later.
How Often
Brush the burr chamber and chute every one to two weeks if you make one or two espresso drinks daily. Heavy users, households grinding 40 to 60 grams or more per day, or anyone using oily dark-roast beans may need weekly cleaning. A deeper cleaning with burr removal is generally appropriate every one to three months.
Clean sooner if the grinder sounds strained, doses inconsistently, produces clumps, or develops a stale smell. Light-roast beans usually leave less oil but can create more hard fragments and fine dust, so visual inspection matters more than following a fixed calendar.
When to Call a Pro or Replace
Stop using the grinder if it makes a new grinding, scraping, or electrical smell; repeatedly jams after cleaning; trips a circuit; or shows a cracked burr carrier. Professional service is also sensible when the burrs cannot be removed without force, the motor shaft appears loose, or the grind collar no longer holds its position.
Replace burrs when the cutting edges look visibly rounded, chipped, or deeply scratched, or when the grinder produces persistently uneven grounds despite cleaning and correct alignment. A burr replacement is often worthwhile on a quality grinder, but on an inexpensive model, compare the repair cost with a replacement price of roughly $40 to $75. Never operate a grinder with a cracked or damaged burr.
FAQ
Can I rinse espresso grinder burrs under water?
Usually, no. Unless the manufacturer specifically says a removable burr is washable, clean it with a dry brush and cloth. Water can remain in hidden seams and cause corrosion or damage.
Should I clean the burrs without removing them?
Yes, for routine maintenance. Brushing the accessible chamber, chute, and lower burr every week or two can prevent buildup. Remove the upper burr for a deeper cleaning only when the manual allows it.
How do I know whether the burrs are clean?
The burr teeth should be free of visible clumps and oily film, the chute should pass grounds without obstruction, and the grinder should run without a new strain or scraping sound. A small purge dose after reassembly helps remove remaining dust.
Will cleaning change my espresso grind setting?
It can. Removing retained grounds or reinstalling the burr may slightly change the starting point. Record your setting before cleaning, then pull a test shot and adjust gradually based on flow and taste.
Ready to decide? Our #1 pick for 2026 is the Small grinder-cleaning brush.
Live price & availability on Amazon.