Last updated: September 24, 2026
Becoming a home barista is less about buying the perfect machine and more about building skills in the right order. Many beginners buy expensive gear, get sour shots and wonky latte art, and blame the equipment. Others start small, learn the fundamentals, and enjoy steady progress that keeps the hobby fun. This guide lays out a practical first 90 days: the minimum gear, the skills to learn in sequence, how to practise without wasting a fortune in beans and milk, and when upgrades actually make sense.
Quick answer: Our top pick in 2026 is the Puck prep — our #1 rated choice. See the full ranked comparison, alternatives and buying advice below.
Decide what kind of home barista you want to be
Home barista hobbies split into a few paths. Espresso purists focus on shots: dialling in, extraction, origin differences. Milk drink lovers care about texture and latte art. Tinkerers enjoy modifying machines, adding PID controllers or pressure profiling. Brew-method explorers mix espresso with pour-over and AeroPress. You do not need to pick one forever, but knowing where your interest lies shapes what you buy first.
Minimum gear to get started
A capable grinder
The grinder is the foundation. An espresso-capable hand grinder or a dedicated electric espresso grinder allows fine, repeatable adjustments. Without one, you cannot dial in properly.
A machine suited to your drinks
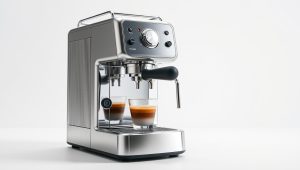
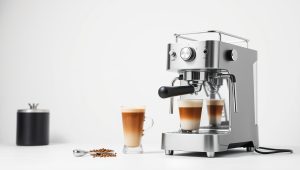
For espresso and occasional milk, a compact single boiler or thermoblock machine is plenty. For daily milk drinks, prioritise decent steam power.
A 0.1 g scale
Weighing dose and yield is the single habit that separates home baristas from people who own espresso machines.
Basic tools
A properly sized tamper, a milk pitcher around 12 oz, a WDT tool and a knock box or bin.
Your first 90 days: skills in order
Weeks 1 to 2: consistent puck prep
Learn to dose the same weight every time, distribute grounds evenly with a WDT tool, and tamp level. Do not worry about taste yet; aim for shots that run in a similar time every pull.
Weeks 3 to 4: dialling in
Use a starting recipe such as 18 g in, 36 g out in 25 to 32 seconds. Change one variable at a time: grind finer if sour and fast, coarser if bitter and slow. Taste every shot straight, even if you drink milk drinks.
Weeks 5 to 8: milk texturing
Practise with cold milk and a cold pitcher. Stretch briefly at the start to add air, then submerge the tip to create a whirlpool until the pitcher is hot to touch. Practising with water and a drop of dish soap saves milk while you learn the motion.
Weeks 9 to 12: latte art and recipes
Start with a heart, then a tulip. Explore flat whites, cortados and cappuccinos. Try a second coffee origin to learn how different beans need different settings.
| Stage | Timeframe | Goal | Practice volume | Common mistake |
|---|---|---|---|---|
| Puck prep | Weeks 1–2 | Shot time within ±3 s | 2–3 shots/day | Not weighing dose |
| Dialling in | Weeks 3–4 | Balanced taste, 1:2 ratio | 2–4 shots/day | Changing several variables at once |
| Milk texturing | Weeks 5–8 | Glossy microfoam | 2 pitchers/day | Too much air, too late |
| Latte art | Weeks 9–12 | Consistent heart and tulip | 1–2 pours/day | Pouring from too high |
| Exploration | Month 4+ | Origins, ratios, brew methods | As desired | Buying upgrades too early |
How to learn faster
Keep a simple log: bean, roast date, dose, yield, time, grind setting and a few words on taste. Patterns jump out after a week. Watch videos from reputable coffee educators and home espresso communities, but compare advice against your own tasting rather than copying settings. Visit specialty cafes and order the same drink you make at home to calibrate your palate. Buy fresh beans with a roast date and use them within about four weeks of roasting.
Budgeting the hobby
Expect a starter setup of roughly $400 to $900, plus $40 to $80 a month in beans and milk during the learning phase, when you pull more practice shots. Hold off on upgrades for at least two to three months. Once you know your preferences, the most rewarding upgrades are usually a better grinder, a bottomless portafilter for diagnosis, and a precision basket.
Staying motivated
Set small goals: a week of consistent shot times, a first recognisable heart, a coffee that tastes as good as your favourite cafe. Share results with friends or online groups. Treat bad shots as data, not failures. The hobby is at its best when you enjoy the process as much as the cup.
FAQ
How long does it take to become a good home barista?
Most people pull reliably good shots within a month of daily practice, and produce decent milk and basic latte art within two to three months.
What should I buy first as a new home barista?
A capable grinder and a scale, then a machine that suits your drinks. These three set the ceiling for everything else you learn.
Bottom line
Start with a good grinder, a suitable machine and a scale, then learn in order: puck prep, dialling in, milk texturing and latte art. Keep a log, change one variable at a time, and wait a few months before upgrading. Built this way, the home barista hobby becomes a satisfying daily craft rather than an expensive frustration.
Ready to decide? Our #1 pick for 2026 is the Puck prep.
Live price & availability on Amazon.