Last updated: September 18, 2026
Learning how to steam milk with espresso machine equipment is mostly about controlling temperature, air, and movement at the same time. Done well, steamed milk becomes glossy and smooth, with a fine layer of microfoam for lattes, cappuccinos, and flat whites. Done badly, it can turn into large bubbles, thin hot milk, scorched foam, or a wand clogged with dried dairy.
The process is easier when you use cold milk, a small stainless-steel pitcher, and a steam wand that is fully purged before and after use. The goal is not simply to make milk hot. You are introducing a small amount of air near the surface, then blending that air throughout the milk until the texture resembles wet paint. Use the following method for consistent results with most home espresso machines in 2026.
As an Amazon Associate we earn from qualifying purchases at no extra cost to you. Product prices and availability are accurate as of the date shown and are subject to change.


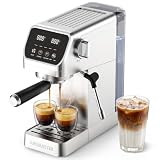
Quick answer: Our top pick in 2026 is the Espresso machine with a steam wand — our #1 rated choice. See the full ranked comparison, alternatives and buying advice below.
What You Need
| Item | Why | Optional? |
|---|---|---|
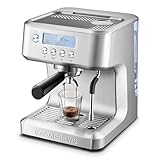
| Espresso machine with a steam wand | Produces the steam needed to heat and texture the milk. A compact machine such as the CASABREWS CM5418, listed at about $140, is designed for home espresso and milk drinks. | No |
| Stainless-steel milk pitcher | Transfers heat quickly and lets you feel when the milk reaches the right temperature. A 12-ounce pitcher, such as the $6-$7 model listed above, suits one small latte or cappuccino. | No |
| Cold milk | Milk straight from the refrigerator gives you more time to create foam before it overheats. Dairy or many barista-style plant milks can work. | No |
| Food thermometer | Helps beginners stop between 140°F and 150°F, the usual range for pleasantly hot milk without a scorched taste. | Yes |
| Clean, damp cloth | Wipes milk from the wand immediately after steaming. | No |
| Espresso or coffee cup | Provides a target for the finished drink and makes pouring easier. | No |
For a 12-ounce pitcher, start with approximately 4 to 6 ounces of milk. The milk expands as air is added, so do not fill the pitcher more than halfway. A larger 20-ounce pitcher is useful for two drinks, but a pitcher that is too large for the amount of milk can make it difficult to position the wand correctly.
Step-by-Step
See also: How to Replace Espresso Machine Water Filter (2026): Step-by-Step • How to Adjust Espresso Machine Brew Temperature (2026): Step-by-Step
-
Prepare the machine and pitcher (1 to 2 minutes)
Fill the machine’s water reservoir with fresh, cool water and turn it on. Allow it to reach steam-ready temperature according to the machine’s indicator. While it heats, pour cold milk into the pitcher. For one latte, use 5 ounces of milk in a 12-ounce pitcher. For a smaller cappuccino, 3 to 4 ounces is usually enough.
Keep the pitcher handle pointed toward your dominant hand. This will make it easier to tilt and rotate the pitcher while the steam wand stays in position.
-
Purge the steam wand (2 to 5 seconds)
Place the wand over the drip tray or an empty cup, then open the steam control briefly. Water often collects inside the wand while the machine is heating. Purging clears that condensation so you begin with dry steam rather than watering down the milk.
Close the steam control before placing the wand into the milk. Never start with the wand already submerged if the machine has not been purged, because the initial burst can cause splashing.
-
Position the wand just below the milk’s surface (10 to 15 seconds)
Set the pitcher on a slight angle and place the steam tip just below the surface, near one side of the milk rather than in the center. Open the steam control fully or to the level recommended by your machine.
You should hear a gentle paper-tearing or soft hissing sound. This is the stretching stage, when air enters the milk. If the wand makes a loud screech, the tip is probably too high or the steam pressure is too strong for your position. If you hear almost nothing, the tip is too deep.
Add air only during the first few seconds. For a latte, aim for a small increase in volume, roughly 10% to 20%. A cappuccino needs more foam, but large bubbles are not the same as good microfoam.
-
Create a whirlpool (15 to 30 seconds)
Once you have added enough air, lower the pitcher slightly so the wand tip sits deeper in the milk. Tilt the pitcher until the milk begins moving in a smooth circular motion. This rolling action breaks up larger bubbles and blends the foam into the liquid.
Keep the steam tip below the surface throughout this stage. Avoid moving the pitcher up and down repeatedly. A steady whirlpool is more effective than vigorous shaking and produces a smoother, shinier texture.
-
Stop at the right temperature (5 to 10 seconds)
Continue steaming until the pitcher reaches approximately 140°F to 150°F. If you are using your hand instead of a thermometer, the pitcher should feel very hot but still briefly touchable near the lower half. Do not wait until the metal is too hot to hold; the milk may already taste cooked.
For safety and flavor, avoid taking milk much beyond 160°F. Overheated milk loses sweetness and can develop a scorched or eggy flavor. Plant-based milks may have slightly different ideal ranges, so stop when the texture is ready and the milk is hot enough for drinking.
-
Shut off steam before removing the wand (1 to 2 seconds)
Close the steam control first, then remove the wand from the pitcher. This prevents a burst of steam from spraying hot milk. Set the pitcher down and tap it gently on the counter once or twice if you see a few surface bubbles. Swirl the milk until it looks glossy and uniform.
-
Clean the wand immediately and pour (1 to 3 minutes)
Wipe the wand with a damp cloth while milk is still wet. Then purge it again for 2 to 5 seconds to clear milk from the steam tip. If the wand has multiple holes, check that each one remains open.
Pour the milk promptly into your espresso. Start from slightly higher above the cup to combine the milk with the coffee, then lower the pitcher near the surface as the cup fills. A slow, controlled pour gives you a latte’s smooth finish; pouring more forcefully near the end creates a thicker foam layer.
Mistakes to Avoid
- Using too much milk: An overfilled pitcher leaves no room for expansion and increases the chance of spills. Fill it no more than halfway.
- Skipping the purge: Water in the steam wand can dilute the milk, while leftover milk can block the tip.
- Holding the tip too high: This creates large, dry bubbles instead of fine microfoam. Listen for a quiet hiss, not a loud screech.
- Putting the wand too deep: Deep placement heats the milk but adds little air, producing hot, flat milk.
- Overheating: Milk above roughly 160°F can taste burnt and lose its natural sweetness.
- Stopping the steam incorrectly: Turn off steam before lifting the wand from the pitcher to prevent splashing.
- Leaving milk on the wand: Dried milk is difficult to remove and can clog the steam holes. Wipe and purge every time.
- Expecting every milk to behave identically: Whole milk is forgiving, while low-fat, skim, oat, almond, and soy products can foam differently. Barista-formulated versions are often easier to texture.
How Often
Steam milk whenever you make a milk-based drink, but clean the wand after every use. Purge it immediately after wiping, even if you are making another drink soon. At the end of the day, wipe the wand again and inspect the steam holes.
Once or twice a week, allow the machine to cool and clean the wand tip according to the manufacturer’s instructions. If milk has dried inside a removable tip, soak only the removable parts in warm water when permitted. Do not immerse the machine or force a pin into the holes unless the manual specifically recommends it.
When to Call a Pro or Replace
Contact the manufacturer or a qualified appliance technician if the machine leaks from inside the housing, trips a circuit, produces a burning electrical smell, or cannot build steam after normal descaling and cleaning. Steam that becomes consistently weak may indicate scale buildup, a failing heating component, or a blocked valve.
Replace a pitcher if it has sharp dents around the rim, a loose handle, corrosion, or a damaged pour spout. Replace a steam wand tip if its holes remain blocked after proper cleaning. Do not continue using equipment that sprays unpredictably or exposes electrical parts to water.
FAQ
What is the best milk for steaming?
Whole dairy milk is usually the easiest starting point because its fat and protein create a creamy, stable texture. Skim milk can make more foam but may feel lighter. Oat, soy, and almond milks can work well, especially versions labeled for barista use. Keep every type cold before steaming and avoid mixing different milks in the pitcher.
How much milk should I steam for one latte?
Start with 4 to 6 ounces in a 12-ounce pitcher. The exact amount depends on the size of your espresso cup and how much foam you prefer. Since the milk expands, begin with less than you think you need. You can steam a second small batch, but reheating or re-steaming milk usually worsens the texture.
Why does my steamed milk have big bubbles?
The wand was likely too high, the milk was stretched for too long, or the finished milk was not swirled. Keep the tip just below the surface for only the first 10 to 15 seconds, then lower it to create a smooth whirlpool. Tap and swirl the pitcher immediately after steaming to dissolve small surface bubbles.
Can I steam milk without an espresso machine?
Yes. A handheld frother, stovetop steam wand, or French press can add air to warmed milk, although the texture and control may differ. Never heat milk in a sealed container. For the closest café-style result, an espresso machine with a properly maintained steam wand gives you the most control over aeration and temperature.
Ready to decide? Our #1 pick for 2026 is the Espresso machine with a steam wand.
Live price & availability on Amazon.