Last updated: September 18, 2026
Setting up a new espresso machine is more than removing it from the box and pressing the power button. A rushed setup can leave packing materials inside the water path, create leaks, produce weak or oddly flavored coffee, or put unnecessary strain on the pump. Milk systems can also collect residue quickly if they are not rinsed after the first use. Whether you are installing a compact manual machine or a fully automatic model, taking 30 to 60 minutes to prepare it properly will give you better coffee and fewer problems.
This guide explains how to set up a new espresso machine in 2026, including machines with a portafilter, built-in grinder, steam wand, or automatic milk system. Always treat your owner’s manual as the final authority for button names, filter baskets, cleaning products, and water limits.
As an Amazon Associate we earn from qualifying purchases at no extra cost to you. Product prices and availability are accurate as of the date shown and are subject to change.
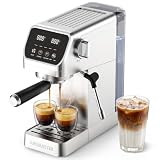

Quick answer: Our top pick in 2026 is the Espresso machine and included accessories — our #1 rated choice. See the full ranked comparison, alternatives and buying advice below.
What You Need
| Item | Why | Optional? |
|---|---|---|
| Espresso machine and included accessories | Most machines include a portafilter, baskets, scoop, tamper, water tank, and cleaning parts. | No |
| Filtered or bottled water | Reduces mineral buildup and improves flavor compared with very hard tap water. | No, unless your tap water is soft and suitable |
| Clean microfiber cloth | Useful for wiping the exterior, steam wand, group head, and spills. | No |
| Dish soap and a soft sponge | For washing removable, non-electrical parts before the first brew. | No |
| Kitchen scale | Helps measure coffee and compare espresso output consistently. | Yes |
| Espresso grinder or fresh pre-ground espresso | Freshly ground coffee usually delivers better crema and flavor. | Yes, if your machine includes a grinder |
| Water-hardness test strip | Helps set the correct descaling schedule on machines that support water testing. | Yes |
Before buying accessories, check what comes in the box. Entry-level machines such as the roughly $100-$150 Aromaster 1400W Espresso Machine with Milk Frother typically provide the basic brewing tools. A fully automatic machine such as the roughly $700-$800 PHILIPS 5500 Series with its LatteGo milk system may include more specialized cleaning and milk components. Prices vary by retailer and promotion.
Step-by-Step
See also: How to Replace Espresso Machine Water Filter (2026): Step-by-Step • How to Adjust Espresso Machine Brew Temperature (2026): Step-by-Step
-
Choose and prepare the location (5 minutes)
Set the machine on a level, stable, water-resistant counter. Leave enough clearance to open the water tank, remove the drip tray, and add coffee without scraping nearby cabinets. As a practical starting point, allow at least 2 inches of space on the sides and back, plus extra overhead room for a top-loading tank or bean hopper. Check the machine’s manual for exact clearance requirements.
Keep it near a grounded outlet, but do not use an extension cord unless the manufacturer specifically permits it. Espresso machines can draw significant power; a 1400-watt model should connect to a suitable 120-volt household circuit. Keep the machine away from the sink’s splash zone and never place it on a hot stovetop.
-
Unpack and inspect every component (5 to 10 minutes)
Remove tape, cardboard, plastic film, foam, and protective inserts from the machine and accessories. Look inside the water tank, bean hopper, portafilter, drip tray, and milk container. Some parts may be packed separately or secured for shipping.
Inspect the power cord, water tank, seals, brew group, and steam wand for cracks or damage. Do not power on a machine with a split tank, loose electrical cord, or visible shipping damage. Photograph the condition and contact the retailer or manufacturer instead.
-
Wash removable parts (5 to 10 minutes)
Wash the water tank, drip tray, portafilter, filter baskets, bean hopper, and removable milk components with warm water and a small amount of dish soap, unless the manual says a part should not be submerged or placed in a dishwasher. Rinse thoroughly so no soap remains.
Wipe the exterior with a damp microfiber cloth. Do not immerse the machine, grinder, control panel, or power cord. Dry parts before reassembly, paying attention to the underside of the water tank and the milk-system connectors.
-
Fill the water tank and assemble the machine (3 to 5 minutes)
Fill the tank with cool, fresh water to—but not above—the maximum line. Use filtered water if your tap water is hard or has a noticeable chlorine taste. Do not use carbonated water, hot water, flavored water, or distilled water unless the manual specifically allows it; some machines need a small amount of mineral content for proper operation.
Seat the tank firmly so its valve opens correctly. Install the drip tray, bean hopper, brew group, portafilter, and any water filter according to the instructions. If the machine includes a milk system, assemble it only after confirming which parts are designed to connect.
-
Turn it on and complete the initial rinse (5 to 10 minutes)
Place a large cup or container under the coffee outlet and another under the hot-water or steam outlet if needed. Turn on the machine and follow the prompts for language, water hardness, filter status, and automatic rinsing.
The first rinse may release water, air, or a harmless plastic-like smell. Run the recommended cycle completely. If the pump sounds loud at first, it may be drawing water into an empty system. Turn the machine off and check the tank position if it continues without producing water.
-
Prime the water circuit (2 to 5 minutes)
Use the machine’s hot-water or steam function to run water until the flow becomes steady. Many machines need this step after shipping or after the tank has been empty. Keep the outlet pointed into a heat-safe container, and avoid touching hot water or steam.
Stop if the machine displays an error, leaks around the tank, or produces only a dry buzzing sound. Recheck the tank, filter, and valve rather than repeatedly running the pump dry.
-
Set up the grinder or prepare the coffee (5 minutes)
For a machine with a built-in grinder, add fresh, dry beans to the hopper. Do not add pre-ground coffee unless the machine has a designated ground-coffee compartment. Start with the grinder’s middle setting and adjust only after tasting the first shot; changing the grind too aggressively can cause a clogged or overly slow brew.
For a manual machine, use an espresso grind rather than a coarse drip grind. Start with the dose recommended in the manual. If no dose is provided, a common starting point is 16 to 18 grams for a double basket, but basket size varies. Distribute the grounds evenly and tamp level without excessive force.
-
Run a seasoning shot and test the milk system (5 to 10 minutes)
Pull the first espresso into a cup and discard it. This flushes the brewing path and helps remove residual manufacturing dust or odors. The first shot may also be poorly balanced while the machine reaches its normal operating temperature.
If your machine has a steam wand, purge it for a few seconds before steaming, then wipe and purge it again immediately afterward. For an automatic milk system, run the manufacturer’s milk-rinse program before making a drink. Check for leaks, unusual odors, and consistent water flow.
-
Make one drink and record your settings (5 minutes)
Prepare a simple espresso before attempting a complicated recipe. Note the grind setting, coffee dose, beverage volume, and taste. A shot that gushes quickly may need a finer grind; a shot that barely drips may need a coarser grind or a smaller dose. Change one variable at a time.
Once the coffee tastes acceptable, save the setting if your machine has programmable buttons. Keep the manual and cleaning tools nearby for the first few weeks.
Mistakes to Avoid
- Do not skip the first rinse because the machine appears clean.
- Do not fill the tank above its maximum line or operate it with too little water.
- Do not use abrasive cleaners, steel wool, or descaling vinegar unless the manufacturer approves it.
- Do not leave milk in a container or hose after making a drink.
- Do not change the grinder setting while beans are stationary if the manual warns against it.
- Do not force a portafilter, brew group, water tank, or drip tray into place.
- Do not judge the machine by one early shot; temperature, grind, and dose often need adjustment.
How Often
Empty and rinse the drip tray and grounds container daily, or whenever the machine signals that they are full. Wipe and purge a steam wand after every use. Rinse an automatic milk system after every drink session and perform its deeper milk cleaning as directed.
Rinse the water tank every few days and wash removable brewing parts weekly. Clean the grinder and bean hopper according to the manual, commonly every one to two weeks with frequent use. Descale when the machine requests it or when your water-hardness instructions indicate; the interval can range from every one to six months. Replace a water filter on its stated schedule, often around two months, but follow the specific product instructions.
When to Call a Pro or Replace
Contact the manufacturer or a qualified appliance technician if the machine repeatedly trips a breaker, smells like burning plastic or wiring, leaks internally, displays an unresolved error, or fails to heat after basic troubleshooting. Stop using it if the power cord or plug becomes hot, cracked, or discolored.
Replacement may make more sense when repair costs approach half the price of a comparable new machine, when the boiler or control board fails outside the warranty period, or when parts are no longer available. A machine that needs only a gasket, filter, shower screen, or pump may be worth repairing.
FAQ
How long should a new espresso machine take to set up?
Allow 30 to 60 minutes for unpacking, washing, rinsing, priming, and making the first drink. A fully automatic machine may take longer if it requires software prompts, water-hardness testing, or a milk-system rinse.
Should I use bottled water in my espresso machine?
Use filtered or bottled water with moderate mineral content if your tap water is hard or tastes unpleasant. Avoid distilled water unless the manual permits it. The correct water choice protects the machine and improves flavor.
Why is my new espresso machine making a loud noise?
A brief loud pump sound can be normal while the machine fills an empty water circuit. Check that the tank is full and seated correctly. Persistent buzzing with no water flow, grinding noises, or loud vibration may indicate an air lock, obstruction, or defect.
Can I make a latte immediately after setup?
Yes, after completing the initial rinse and priming cycle. For a steam wand, purge before and after steaming. For an automatic milk system, run the first cleaning or rinse cycle and use cold milk as directed by the manufacturer.
Ready to decide? Our #1 pick for 2026 is the Espresso machine and included accessories.
Live price & availability on Amazon.