Last updated: September 18, 2026
Espresso brew temperature has a direct effect on flavor, extraction, and consistency. If the water is too cool, coffee can taste sour, thin, or grassy because it has not extracted enough soluble flavor. If it is too hot, the shot may taste bitter, burnt, or harsh. Temperature swings can also make two shots from the same bag taste completely different.
Learning how to adjust espresso machine brew temperature is usually straightforward, but the correct method depends on the machine. A model with PID controls may let you set an exact temperature, while an entry-level thermoblock machine may require a brew switch, heat-up routine, or manufacturer-recommended surfing technique. The steps below explain how to make a controlled adjustment without chasing flavor one variable at a time.
As an Amazon Associate we earn from qualifying purchases at no extra cost to you. Product prices and availability are accurate as of the date shown and are subject to change.
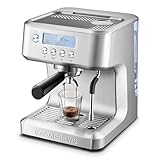

Quick answer: Our top pick in 2026 is the Espresso machine with a temperature setting or indicator — our #1 rated choice. See the full ranked comparison, alternatives and buying advice below.
What You Need
| Item | Why | Optional? |
|---|---|---|
| Espresso machine with a temperature setting or indicator | Allows you to change or monitor brew-water temperature | No |
| Fresh coffee beans | Old or stale beans can taste flat regardless of temperature | No |
| Grinder capable of fine adjustments | Temperature changes should be evaluated with a consistent grind | No |
| Digital scale with at least 0.1-gram resolution | Helps keep the dose and yield consistent from shot to shot | Recommended |
| Timer | Shows whether a temperature change also affected shot time | Recommended |
| Thermometer or group-head thermometer | Useful when the machine does not display brew temperature | Optional |
| Filtered water | Reduces scale buildup and improves repeatability | Recommended |
Many home machines use a thermoblock or single-boiler system and may not deliver the exact temperature shown on a display at the coffee puck. A setting such as 200°F is a control target, not a guarantee that every drop reaches the coffee at precisely 200°F. Treat the machine’s number as a starting point and use taste, shot timing, and consistent preparation to judge the result.
Step-by-Step
See also: How to Replace Espresso Machine Water Filter (2026): Step-by-Step • How to Unclog an Espresso Machine Group Head (2026): Step-by-Step
-
Check the machine’s temperature controls (5 minutes)
Look for a digital menu, plus and minus buttons, a temperature dial, or a setting labeled “brew temperature.” Some machines separate brew temperature from steam temperature; adjust only the brew setting. If there is no temperature control, check the manual for instructions on preheating and brew-switch timing rather than forcing a setting that the machine does not support.
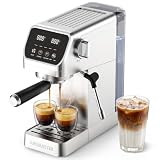
Machines with PID temperature control commonly allow adjustments in 1°F or 1°C increments. Basic models may offer only low, medium, and high settings. If your machine has a grinder and integrated temperature control, such as an AMZCHEF-style machine priced around $190 to $200, confirm whether the displayed value refers to boiler water, thermoblock water, or a programmable brewing target.
-
Choose a sensible starting temperature (2 minutes)
Set the machine between 198°F and 204°F (92°C to 96°C) for most coffees. A medium roast often works well around 200°F to 202°F. Dark roasts generally benefit from a slightly lower setting, about 195°F to 199°F, because they extract readily and can become bitter. Light roasts often need 201°F to 205°F to bring out sweetness and reduce sourness.
Stay within the machine’s stated operating range. Do not raise the temperature simply because a light roast tastes sour; grind size, dose, yield, and channeling can produce the same symptom.
-
Preheat the machine and portafilter (10 to 20 minutes)
Turn on the machine and allow it to reach its ready indication. For more stable results, let the portafilter lock into the group head while the machine heats. Run a brief flush of water through the group head, then dry the basket before dosing.
Compact machines, including many thermoblock models, may heat in a few minutes but still need additional time for the metal portafilter and group head to warm evenly. A cold portafilter can lower the brewing temperature at the puck and make a correctly programmed temperature appear ineffective.
-
Prepare a repeatable test shot (5 minutes)
Use one dose, one coffee, and one basket for your comparison. A common starting recipe is 18 grams of coffee in and 36 grams of espresso out, with a target time of roughly 25 to 35 seconds. Your machine may use a different basket size, so follow its capacity markings and avoid overfilling.
Distribute the grounds evenly, tamp level with consistent pressure, and start the shot immediately after locking in the portafilter. Record the temperature setting, dose, yield, time, and flavor. This creates a useful baseline before you make an adjustment.
-
Adjust the temperature in small increments (2 minutes per change)
Change the setting by 2°F to 4°F (1°C to 2°C) at a time. Wait for the machine to stabilize according to its display or manual, then pull another shot using the same dose, grind, and yield. Changing by 10°F at once makes it difficult to tell where the improvement occurred.
If the espresso tastes sour, sharp, or underdeveloped after you have confirmed that the shot is not rushing through the coffee, raise the temperature slightly. If it tastes bitter, ashy, or drying, lower it slightly. Adjust only one major variable at a time.
-
Use temperature surfing only when necessary (1 to 3 minutes)
On a machine without PID control, temperature surfing means timing a brew flush or waiting period to approximate a more stable brewing range. The correct timing varies by machine, so use the manufacturer’s instructions first. A common approach is to wait until the ready light cycles, run a short flush until it stops sputtering, then lock in the prepared portafilter and brew.
Do not rely on a long, continuous flush to “cool” every machine. It can empty the thermoblock or boiler and cause the next shot to be cooler than expected. Repeat the same routine every time and judge the result by taste rather than assuming the water is at a specific temperature.
-
Confirm the result with two or three shots (10 minutes)
One shot can be misleading because of uneven distribution, a stale bean, or a grind adjustment that was not fully settled. Pull at least two more shots at the preferred temperature. Keep the recipe consistent and taste each espresso after it cools for about one minute.
Once you find a good setting, write it down with the coffee roast level, dose, yield, and grind position. A machine such as the CASABREWS Ultra, which includes a steam wand and typically sells in the roughly $180 to $210 range depending on the seller and configuration, may require more attention to warm-up and workflow than a PID-equipped machine. A written routine helps compensate for those differences.
Mistakes to Avoid
- Changing temperature and grind together: You will not know which adjustment changed the flavor.
- Ignoring roast level: Dark roasts can taste burnt at temperatures that suit light roasts.
- Trusting the display blindly: A displayed boiler or thermoblock temperature may not equal the temperature at the coffee puck.
- Skipping preheating: A cold group head and portafilter can undermine a correct setting.
- Using an inaccurate thermometer: Measuring water in the cup or during a flush does not necessarily measure brew temperature.
- Chasing sourness with heat alone: Fast flow, channeling, an insufficient yield, or underdeveloped beans may be the real cause.
- Making extreme adjustments: Stay within the machine’s manual and change only a few degrees at a time.
- Neglecting scale: Mineral buildup can restrict water flow and make temperature behavior inconsistent.
How Often
Recheck your temperature when you open a new coffee, change roast level, or notice a persistent flavor change. You usually do not need to adjust it for every bag if the roast profile is similar. Clean the group head and backflush as directed by the manufacturer, often weekly with regular use. Descale according to the manual and your water hardness; using filtered water can reduce how often descaling is needed, but it does not eliminate maintenance.
Before making a temperature change, verify the grinder, dose, yield, and shot time. A temperature adjustment is most useful after the basic recipe is already reasonably consistent.
When to Call a Pro or Replace
Contact a qualified appliance technician if the machine repeatedly overheats, leaks near electrical components, trips a circuit breaker, produces steam from the wrong outlet, or shows a temperature error. Stop using it if you smell burning wiring or see damaged insulation. Never open a powered machine; boilers and heating systems can contain hot water and dangerous pressure.
Consider replacement when repair costs approach the price of a new machine, parts are unavailable, or the machine cannot maintain a stable brew cycle after cleaning and servicing. Upgrading to a model with PID control may be worthwhile if you regularly brew light roasts and want repeatable temperature adjustments, but a well-maintained basic machine can still produce good espresso with a consistent workflow.
FAQ
What is the best temperature for espresso?
For most coffees, start between 198°F and 204°F (92°C to 96°C). Use the lower end for many dark roasts and the higher end for many light roasts, then adjust in 2°F to 4°F steps based on taste.
Should I raise the temperature when espresso tastes sour?
Sometimes, but first check whether the shot is extracting too quickly. A finer grind, better distribution, or a slightly higher yield may solve sourness without changing temperature. If those variables are consistent, raising the temperature a few degrees can help.
Can I measure espresso brew temperature with a kitchen thermometer?
Only as a rough indication. Measuring water in the cup does not show the temperature at the coffee puck. A group-head thermometer or a machine with calibrated PID control is more useful, though taste and repeatability remain important.
Why does my machine’s temperature change between shots?
Possible causes include inadequate warm-up, a thermoblock recovering between shots, a long flush, scale buildup, or switching immediately between brewing and steaming. Allow the machine to recover, follow the same workflow, and service it if temperature swings remain large.
Ready to decide? Our #1 pick for 2026 is the Espresso machine with a temperature setting or indicator.
Live price & availability on Amazon.